Contents
When you’ve experienced water damage, tackling mold remediation effectively is crucial for your home’s health. You need to assess the moisture source first and ensure proper ventilation in the affected areas. As you identify mold growth, using protective gear will help keep you safe during the process. But that’s just the beginning—there are several essential strategies that can make a significant difference in your remediation efforts. Curious about the specific steps you can take to ensure a successful outcome?
Key Takeaways
- Identify and eliminate the source of moisture to prevent further mold growth.
- Ensure proper ventilation during the cleaning process to aid drying and reduce humidity.
- Use appropriate cleaning and disinfecting methods, including detergents and mold-specific disinfectants.
- Seal off affected areas with heavy-duty plastic sheeting to contain mold spores during remediation.
- Conduct regular inspections and maintain humidity levels at about 60% to deter mold recurrence.
Assessing Water Damage
When you assess water damage, the first step is to identify the source of moisture. Without pinpointing the origin, your efforts in water damage assessment will be largely ineffective. Look for visible leaks, damp spots, or areas with increased humidity. Common sources include broken pipes, roof leaks, or overflowing appliances.
Once you’ve located the source, employ moisture detection techniques to gauge the extent of the damage. Use a moisture meter to measure the moisture levels in materials like drywall, wood, or concrete. This device provides objective data, helping you determine if materials are saturated and require removal or if they can be dried in place. Infrared cameras can also be beneficial, revealing hidden moisture behind walls or ceilings.
Document your findings meticulously. Photos, readings, and notes will create a comprehensive record, which is invaluable for insurance claims and future reference.
Don’t forget to assess the surrounding areas. Often, water can migrate, causing damage far from the initial source.
After assessing the damage, prioritize remediation efforts. Addressing the source of the moisture must come first, followed by drying affected areas and materials.
It’s essential you act quickly; the longer you wait, the greater the risk of mold growth and structural damage. By following these steps, you’ll create a solid foundation for effective mold remediation and restore your space to a safe, healthy condition.
Ensuring Proper Ventilation
To effectively combat mold growth, you must assess airflow requirements in your space.
Proper ventilation ensures moisture doesn’t accumulate, creating an environment conducive to mold.
Utilizing dehumidifiers effectively further enhances air quality, helping to maintain optimal humidity levels.
Assess Airflow Requirements
Proper ventilation is crucial for effective mold remediation, as it helps to control humidity levels and prevent further growth. To successfully assess airflow requirements, you’ll need to analyze the existing airflow patterns in your space. Start by identifying any stagnant air zones where moisture could accumulate. This analysis allows you to pinpoint areas that may require enhanced ventilation strategies.
Consider cross-ventilation to promote air movement throughout the affected areas. Open windows and doors, if weather permits, to create a natural flow. Additionally, employ fans to circulate air, ensuring that moist air is directed toward open exits. Be mindful of the direction of airflow; you want to push humid air out while pulling drier air in.
It’s also essential to evaluate your HVAC system. Ensure that filters are clean and that the system is functioning properly to aid in moisture control. Regular inspections can help maintain optimal airflow, reducing the risk of mold resurgence.
Utilize Dehumidifiers Effectively
After ensuring adequate airflow, utilizing dehumidifiers effectively can significantly enhance your mold remediation efforts. Proper dehumidifier placement is crucial in achieving optimal humidity levels, which helps prevent mold regrowth. Here’s how to maximize your dehumidifiers during the remediation process:
| Tip | Description |
|---|---|
| Positioning | Place dehumidifiers in areas with the most moisture. |
| Airflow Management | Ensure they’re not obstructed by furniture or walls. |
| Continuous Operation | Keep them running continuously until humidity levels drop below 60%. |
| Monitor Humidity Levels | Use a hygrometer to track progress towards optimal humidity. |
Make sure to check your dehumidifier’s settings regularly and adjust as needed. When you maintain optimal humidity, you create an environment that’s less favorable for mold growth. Remember, consistent monitoring and the right placement make a significant difference. Join others in the community striving for a healthy living environment, and take these steps to ensure your home stays mold-free. Your efforts in implementing these dehumidifier strategies will pay off in the long run.
Identifying Mold Growth
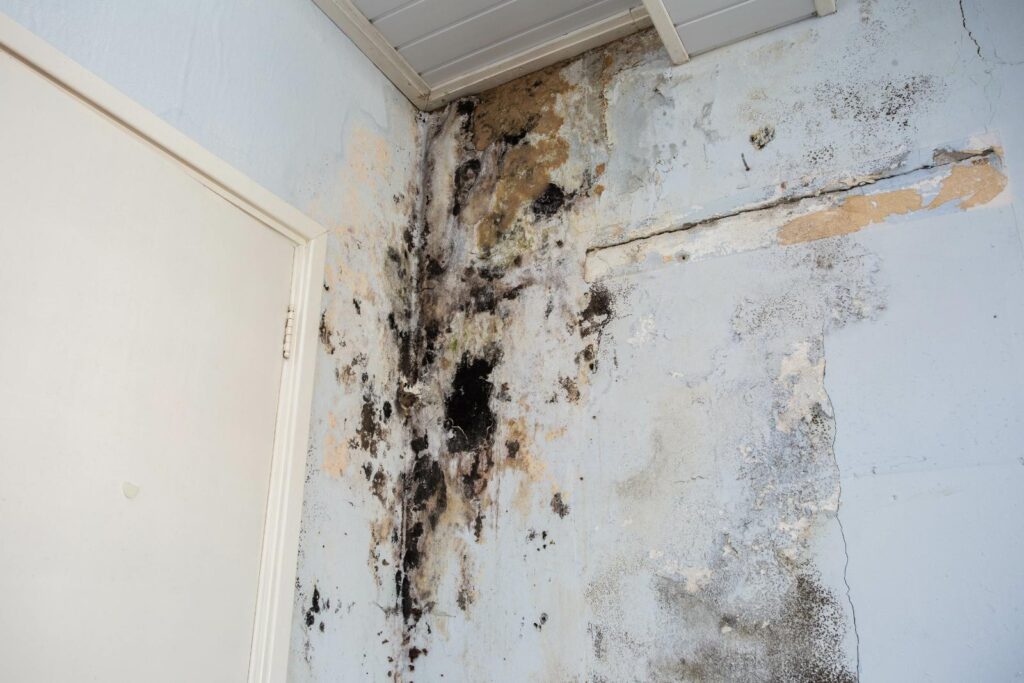
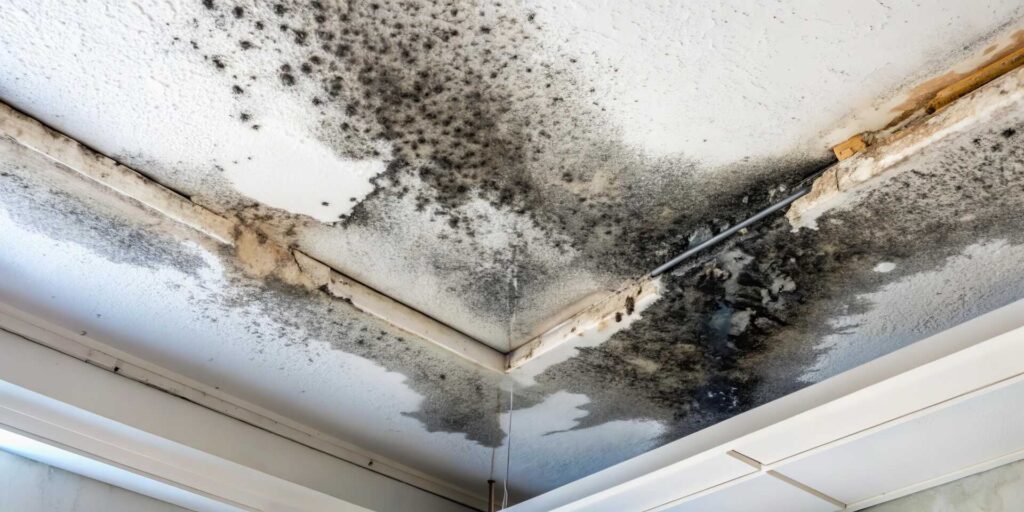
Identifying mold growth is crucial in maintaining a healthy indoor environment. Mold can develop rapidly, especially in areas with excessive moisture, so knowing how to spot it early is key.
Start by examining common mold types, such as Aspergillus, Cladosporium, and Stachybotrys. Each type has distinct characteristics, but they all thrive under similar growth conditions, including warmth, humidity, and organic material.
Check areas in your home that are prone to dampness, like bathrooms, kitchens, basements, and behind appliances. Look for visible signs of mold, which often appear as discolored patches—typically black, green, or white.
Don’t just rely on sight; a musty odor can also indicate mold presence, even if it’s not immediately visible.
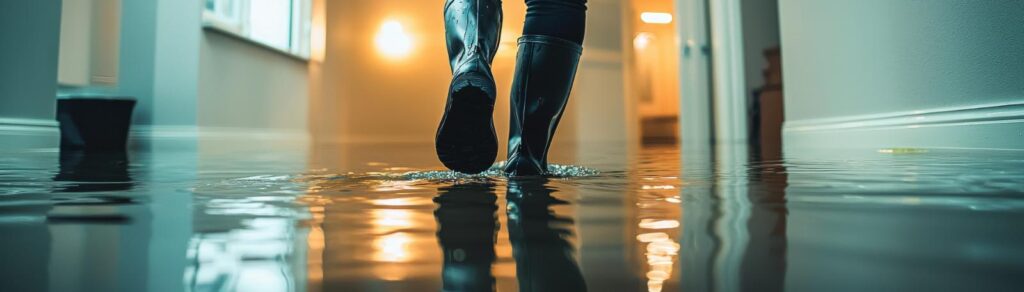
Pay attention to water leaks or flooding incidents, as these create perfect environments for mold to flourish. If you’ve recently experienced water damage, inspect all affected areas thoroughly.
Remember that mold can also grow behind walls or under carpets, so you may need to remove materials to assess the situation properly.
Regularly check your home’s humidity levels; ideally, they should stay below 60%. If you notice any changes in your indoor air quality or persistent humidity, take action.
Using Protective Gear
When tackling mold remediation, using the right protective gear is crucial for your safety.
Essential equipment includes respirators, gloves, and goggles designed to shield you from harmful spores.
It’s important to follow proper usage guidelines to ensure maximum protection throughout the remediation process.
Essential Protective Equipment
Using the right protective gear is crucial for safely navigating mold remediation. First, choose appropriate glove types to protect your hands from mold spores and harsh chemicals. Nitrile gloves are an excellent choice, as they’re resistant to punctures and chemicals, ensuring a reliable barrier. Avoid latex if you’re unsure about potential allergies.
Next, consider mask specifications. Opt for a mask with an N95 rating or higher, which filters out at least 95% of airborne particles, including mold spores. For extensive mold exposure, a respirator with a P100 filter may be necessary, providing even greater protection. Ensure the mask fits snugly to prevent any leaks that could allow mold spores to enter.
Additionally, wear protective eyewear to shield your eyes from irritants. Goggles should fit securely and provide a seal around the eyes, preventing exposure during remediation activities.
Lastly, consider donning coveralls or disposable suits to minimize skin contact with mold and contaminants.
Proper Usage Guidelines
After selecting the right protective gear, knowing how to use it properly is vital for effective mold remediation. Start by ensuring your gear fits correctly; loose-fitting equipment can allow spores to enter. Wearing gloves is essential, so choose chemical-resistant types that extend past your wrists. This way, you create a barrier against mold and cleaning agents.
Always wear a mask with a P100 respirator rating to filter out airborne spores. Make sure it seals tightly against your face, as gaps can compromise protection. Eye protection, such as goggles, should also be worn to prevent irritation from spores and cleaning solutions.
When entering a contaminated area, follow mold prevention strategies by sealing off the space with plastic sheeting. This helps contain spores and prevents them from spreading.
Maintain good ventilation while working; however, avoid creating drafts that could disturb settled spores.
Lastly, remember to dispose of your gear properly after use. Contaminated items should be sealed in plastic bags to prevent cross-contamination.
Containing the Affected Area
Containing the affected area is crucial for effective mold remediation. When you face a mold issue, your first step is to implement mold containment strategies that prevent spores from spreading to unaffected areas. This process protects your living space and makes remediation more efficient.
Start by sealing entry points. Use plastic sheeting to cover doors, windows, and vents leading into the contaminated area. Ensure that you use heavy-duty plastic (at least six mil thickness) to create a barrier. Tape the edges securely with duct tape to eliminate any gaps. This will help control air movement and minimize the risk of spores traveling to other parts of your home.
Next, close off any openings where air might escape, such as gaps in walls or floors. If you have HVAC systems, shut them down to prevent mold spores from circulating through the ducts. You might also consider using negative air pressure machines to enhance containment. These devices will help filter out spores while keeping the contaminated air confined.
Don’t forget to wear appropriate protective gear, including gloves, masks, and goggles, to safeguard yourself during the remediation process.
Removing Moisture Sources
Identifying and removing moisture sources is essential for preventing mold growth during remediation. Start by inspecting your property for any visible signs of water intrusion. Look for leaks in plumbing, roofs, or walls, as even small drips can lead to significant moisture accumulation over time. Once you find these sources, make the necessary repairs immediately.
Next, evaluate your drainage systems. Proper drainage is vital in directing water away from your home’s foundation. Ensure gutters are clean and functioning, downspouts are directing water away, and grading around your property slopes away from the structure. If you notice pooling water, consider installing additional drainage solutions.
Incorporating moisture barriers is another effective strategy. These barriers can be installed in basements, crawl spaces, and other vulnerable areas to prevent moisture from seeping into your living space. Look for high-quality vapor barriers made from polyethylene or similar materials to provide a long-lasting solution.
Additionally, monitor indoor humidity levels. Ideally, these should be kept at about 60%. Use dehumidifiers in areas prone to excess moisture, such as basements or bathrooms, to maintain this range. Regularly inspect these devices to ensure they’re functioning effectively.
Cleaning and Disinfecting
Regularly cleaning and disinfecting areas affected by mold is crucial for ensuring a thorough remediation process. Once you’ve addressed the moisture sources, it’s time to focus on effective cleaning techniques to eliminate any remaining spores and prevent future growth.
Start by wearing protective gear, including gloves and masks, to safeguard yourself during the cleaning process.
Use a mixture of water and detergent to scrub hard surfaces, ensuring you remove all visible mold. For porous materials like drywall or carpets, it’s often more effective to discard and replace these items, as mold can penetrate deeply.
After scrubbing, apply a disinfectant specifically designed for mold removal. Products containing bleach, hydrogen peroxide, or commercial mold removers can be effective but always follow the manufacturer’s instructions for safe and effective use.
Incorporating mold prevention strategies is essential as you clean. After disinfecting, ensure that airflow is adequate in the affected areas. This helps dry out surfaces and reduces the humidity that mold thrives on.
Regular maintenance, such as cleaning gutters and ensuring ventilation in bathrooms and kitchens, can further minimize future mold risks.
Don’t forget to inspect and clean hidden areas, such as behind appliances and under sinks, to ensure mold doesn’t have a chance to return.
Utilizing Dehumidifiers
Dehumidifiers are essential tools in the battle against mold, as they effectively lower humidity levels in your home. High moisture levels create an ideal environment for mold growth, making it crucial to control humidity after water damage. Using a dehumidifier helps to reduce these moisture levels, significantly minimizing the risk of mold infestations.
When utilizing a dehumidifier, proper placement is key. Position the unit in areas where moisture is most concentrated, such as basements, bathrooms, and near water-damaged materials. Ensure there’s adequate airflow around the unit by keeping it away from walls and furniture. This maximizes its efficiency and helps it work more effectively to extract damp air.
Monitor the humidity levels in your home using a hygrometer, aiming for a relative humidity of about 60%. Adjust the dehumidifier settings accordingly to maintain this range. Regularly empty the water collection tank or, if possible, use a continuous drainage setup to keep the unit running without interruption.
It’s also beneficial to run the dehumidifier continuously during the remediation process, especially in the initial stages after water damage. This proactive approach can help prevent mold spores from settling and proliferating.
Repairing Structural Damage
After managing humidity levels with dehumidifiers, addressing any structural damage becomes vital in preventing mold from re-establishing itself. You need to ensure that your home’s structural integrity is intact, as compromised structures can harbor moisture and create an ideal environment for mold growth.
Start by assessing the areas affected by water damage. Look for signs of warped wood, weakened foundations, or compromised drywall. If you notice any of these issues, use appropriate repair techniques to restore the affected areas.
For example, replace any rotted or water-damaged wood with treated lumber that’s resistant to moisture. This enhances the structural integrity of your home while preventing future mold issues.
When dealing with drywall, cut out and replace sections that have been soaked through. Ensure that you use moisture-resistant drywall in areas prone to humidity.
Additionally, inspect insulation materials, as they can become breeding grounds for mold if damaged. Replace any wet or moldy insulation to maintain a healthy environment.
Remember to use proper techniques when sealing and painting repaired surfaces. High-quality, mold-resistant paint can provide an extra layer of protection against future mold growth.
Always ensure that the areas you repair are thoroughly dry before applying any finishes.
Monitoring for Recurrence
To effectively monitor for mold recurrence, establish a regular inspection schedule for areas previously affected.
Implement humidity control measures to maintain optimal indoor moisture levels, as excess humidity can promote mold growth.
Staying proactive in these areas is crucial for long-term mold prevention.
Regular Inspections Schedule
Regular inspections are essential for preventing mold from making a return after remediation. By establishing a regular inspection schedule, you can effectively monitor any potential mold growth and address issues before they escalate. The benefits of regular inspections include early detection of moisture problems, which is crucial for maintaining a mold-free environment.
Inspection frequency recommendations vary based on your specific situation. For homes in humid climates or with a history of water damage, monthly inspections are advisable for the first year post-remediation. In more stable environments, quarterly inspections may suffice.
During these inspections, pay close attention to areas prone to moisture, such as basements, bathrooms, and around plumbing fixtures.
You should also document your findings and any corrective actions taken. This record assists in tracking progress and can provide peace of mind, knowing you’re actively managing your home’s health.
Humidity Control Measures
Effective humidity control is crucial for preventing mold growth and ensuring a healthy indoor environment. To maintain optimal humidity levels, aim for a range of about 60%. Use a hygrometer to monitor these levels regularly, especially in areas prone to moisture, like basements and bathrooms. If humidity levels exceed 60%, take immediate action to decrease moisture.
Employing moisture control strategies is essential. Consider using dehumidifiers in high-humidity areas, ensuring they’re appropriately sized for the space. Regularly clean and maintain HVAC systems, as well-functioning units help regulate humidity.
Ventilation is key; ensure exhaust fans are operational in bathrooms and kitchens, and open windows when weather permits.
Keep an eye out for signs of recurring mold, such as musty odors or visible growth. If you notice these signs, re-evaluate your humidity control measures immediately.
It’s a team effort—stay proactive by sharing findings with your household members, making everyone responsible for maintaining a mold-free space. By staying vigilant and committed to moisture control, you can significantly reduce the chances of mold recurrence, creating a healthier environment for you and your loved ones.
Final Thoughts
In the battle against mold after water damage, you hold the reins of prevention and recovery. By following these ten tips, you can turn the tide, ensuring your home remains a fortress against moisture and mildew. Think of mold remediation as a symphony; each step harmonizes to create a healthier living environment. Stay vigilant, educate your household, and conduct regular checks. With diligence, you’ll restore and fortify your space against future intrusions.