Contents
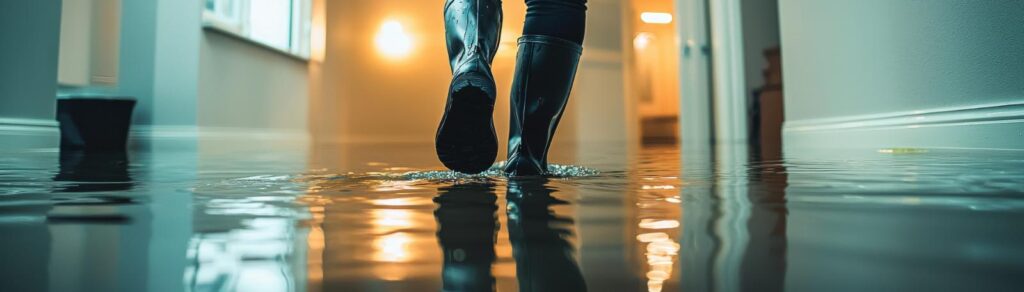
Mold can grow within just 24 to 48 hours after water damage occurs. If you’ve experienced any flooding or leaks, it’s essential to act quickly to mitigate potential health risks and structural damage. You might be wondering which strategies are most effective to tackle this issue effectively. Understanding the best practices helps in remediation and prevents future mold growth. So, what steps should you take to ensure your environment remains safe and mold-free?
Key Takeaways
- Conduct a thorough assessment to identify mold growth sources and affected materials after water exposure.
- Implement effective moisture control by maintaining indoor humidity below 60% and using dehumidifiers.
- Ensure proper ventilation by utilizing natural airflow and installing exhaust fans in damp areas.
- Use appropriate mold remediation techniques, including physical removal and eco-friendly cleaning solutions.
- Educate occupants on mold prevention strategies and conduct routine inspections for water damage or mold growth.
Identify Mold Growth Sources
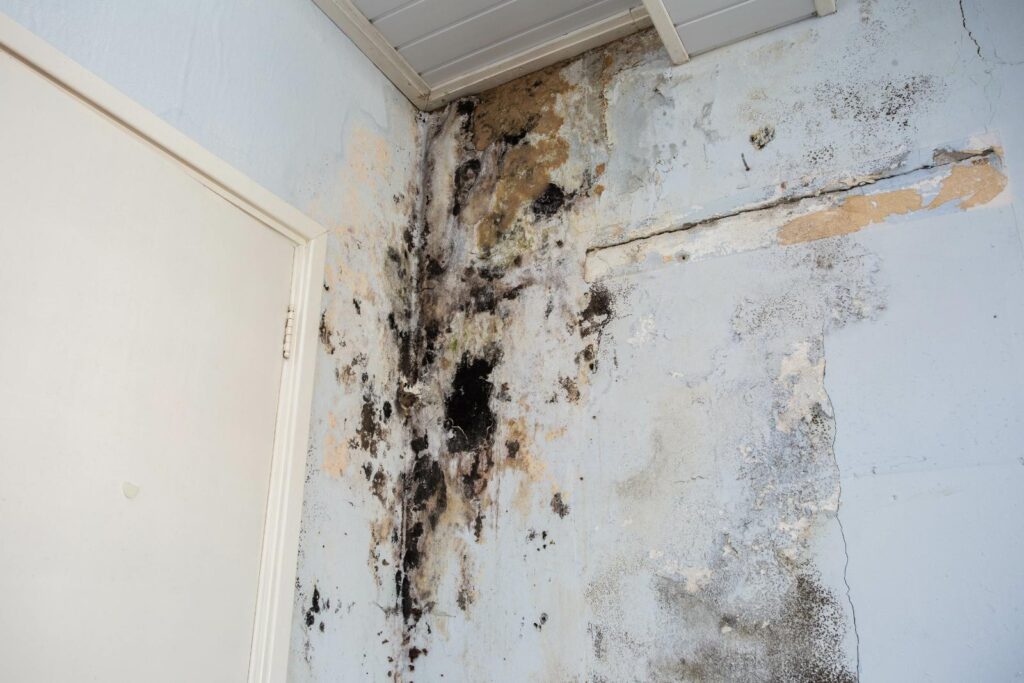
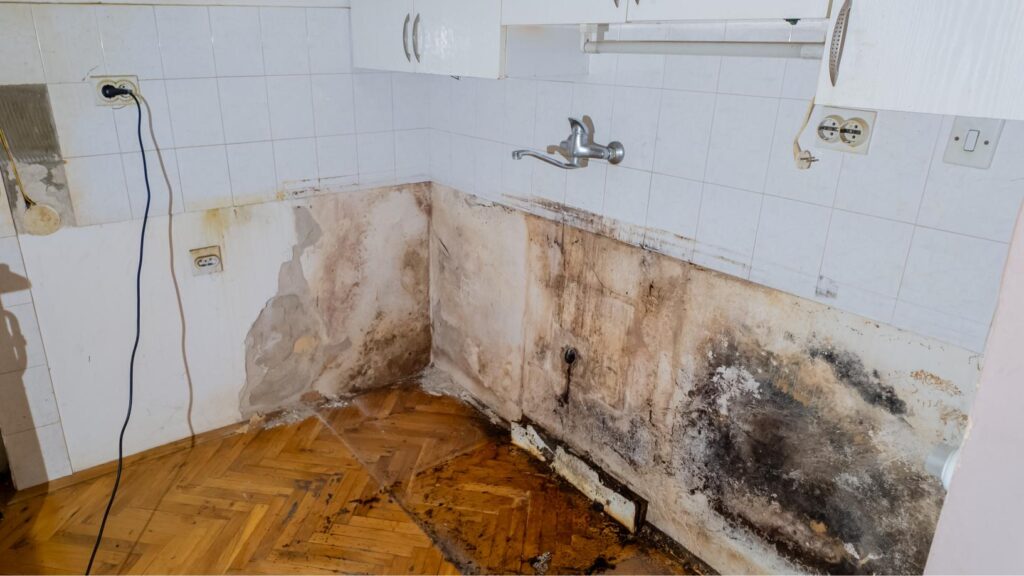
Identifying mold growth sources is crucial for effective remediation after water damage. When you understand where mold thrives, you can better tackle the problem. Various mold types exist, each with specific growth conditions. Common types include Aspergillus, Cladosporium, and Stachybotrys, often referred to as black mold. They flourish in environments with excess moisture, warmth, and limited airflow.
To begin identifying sources, inspect areas that have experienced water damage. Look for visible signs of mold, such as black or green patches on walls, ceilings, and floors. Pay close attention to hidden spaces, like behind drywall or under carpets, where moisture can linger unnoticed. Remember, mold can start growing within 24 to 48 hours after water exposure, so time is of the essence.
Next, evaluate the growth conditions. High humidity levels, leaks, or poor drainage systems can contribute to mold development. You might notice moisture in basements, crawl spaces, or around windows, which are prime suspects for mold growth. Conducting humidity checks can also be beneficial; mold tends to thrive in environments above 60% relative humidity.
Finally, document your findings. Keeping a detailed record of mold types and their locations helps you create a targeted remediation plan. By understanding these growth sources, you’re addressing the symptoms and preventing future infestations, fostering a healthier living environment for you and your loved ones.
Ensure Proper Ventilation
After pinpointing where mold might thrive, it’s important to focus on how to prevent its growth. One of the most effective strategies is ensuring proper ventilation in your space. Good airflow management is essential because it reduces moisture levels, making it less hospitable for mold. Without sufficient ventilation, damp conditions can persist, allowing mold spores to settle and multiply.
To achieve effective ventilation, consider the following components:
| Ventilation Type | Benefits | Recommended Actions |
|---|---|---|
| Natural Ventilation | Cost-effective, fresh air | Open windows and doors regularly; use exhaust fans in kitchens and bathrooms. |
| Mechanical Ventilation | Controlled airflow, efficient | Install ventilation systems with filters; ensure they’re regularly maintained. |
| Cross Ventilation | Enhances air exchange | Position vents or fans to create a flow from one side of the room to the other. |
| Spot Ventilation | Targeted moisture control | Use localized fans in areas prone to dampness, like laundry rooms. |
| Whole-House Ventilation | Comprehensive air management | Install a whole-house system that works with your HVAC to circulate air throughout the home. |
Control Humidity Levels
To effectively control humidity levels after water damage, you need to use dehumidifiers strategically throughout your space.
Regularly monitoring indoor humidity levels is essential to prevent mold growth, as maintaining a relative humidity below 60% can significantly reduce the risk.
Use Dehumidifiers Effectively
Effective moisture control is crucial in preventing mold growth after water damage and using dehumidifiers can play a vital role in this process. Selecting the right dehumidifier types is essential for maximizing their effectiveness. You’ll find options like refrigerant dehumidifiers, which are ideal for warmer spaces, and desiccant dehumidifiers, which are perfect for cooler environments. Understanding your space’s specific needs allows you to choose the best fit.
Once you’ve chosen a dehumidifier, setting it to optimal settings is key. Aim for a humidity level of about 60% to inhibit mold growth effectively. For best results, run the dehumidifier continuously in the affected area until the moisture levels stabilize.
If you’re dealing with extensive water damage, consider placing multiple units in different rooms to ensure thorough humidity control. Regularly check the water tank and empty it as needed, or opt for models with continuous drainage options for convenience.
Monitor Indoor Humidity Levels
Monitoring indoor humidity levels is a vital step in controlling mold growth following water damage. High humidity can create an environment where mold thrives, making it essential to keep levels in check. You can achieve this by using humidity sensors, which provide real-time data on your indoor air quality.
Here’s a quick overview of humidity levels and their impact:
| Humidity Level (%) | Mold Growth Risk | Recommended Action |
|---|---|---|
| Below 30% | Low | Increase humidity slightly |
| 30% – 50% | Moderate | Maintain current levels |
| 51% – 70% | High | Use dehumidifiers |
| Above 70% | Very High | Immediate remediation needed |
Use Effective Cleaning Solutions
Choosing the right cleaning solutions is crucial for successful mold remediation after water damage. You want to ensure that the products you use effectively eliminate mold while also being safe for your home and the environment. Here are some options to consider:
Eco-Friendly Cleaners: These are great alternatives to harsher chemicals. Look for products that are biodegradable and free from toxic substances. They’re safe for your family, pets, and the environment.
Commercial Solutions: If the mold infestation is severe, you might need to turn to commercial cleaning solutions specifically designed for mold removal. These products often contain stronger agents that can penetrate and destroy mold at its source.
Vinegar and Baking Soda: Both are natural and effective for minor mold issues. Vinegar can kill many types of mold while baking soda helps absorb moisture and prevent mold growth. Mixing them can create a powerful cleaning solution to use on affected areas.
Hydrogen Peroxide: This is another effective eco-friendly option. It’s antifungal and antibacterial, making it ideal for mold remediation. A 3% solution can be sprayed directly onto the moldy surface and left to sit for about 10 minutes before scrubbing.
Implement Physical Removal Techniques
After selecting suitable cleaning solutions, the next step in mold remediation is to implement physical removal techniques. This process involves carefully eliminating visible mold colonies from surfaces to ensure a thorough cleanup.
You’ll want to begin by gathering the right tools, such as scrapers, brushes, and vacuum cleaners with HEPA filters. These tools are essential for effectively dislodging mold spores from contaminated materials.
When you start the removal process, always prioritize safety precautions. Wear protective gear, including gloves, goggles, and a mask, to shield yourself from harmful mold spores and chemical agents.
Ventilate the area as much as possible, opening windows and using fans to circulate air, reducing the risk of inhaling any toxic particles.
As you work, focus on affected surfaces like drywall, wood, and carpeting. For porous materials, like carpets, it’s often more effective to replace them entirely, as mold can embed itself deep within the fibers.
For non-porous surfaces, scrub them thoroughly with your chosen cleaning solutions and then wipe away residual mold. This step is crucial; if any spores are left behind, they can quickly regenerate.
Once you’ve removed visible mold, it’s important to dispose of all contaminated materials properly. Seal them in plastic bags before throwing them away to prevent spores from escaping.
Replace Damaged Materials
After identifying affected materials, your next step is to replace them to prevent further mold growth.
It’s crucial to ensure proper disposal of damaged items to minimize contamination risk.
Identify Affected Materials
Identifying affected materials is crucial when tackling mold remediation following water damage. When you assess your space, you’ll want to focus on the various affected material types that may harbor mold growth.
Employing effective mold identification techniques will help you pinpoint the areas that require attention.
Here’s a checklist to guide your inspection:
Drywall: Look for discoloration, warping, or softness, as these are indicators of water damage and potential mold.
Carpet and Padding: Check for dampness and any musty odors. If they feel wet or appear stained, they may need replacement.
Insulation: Inspect any insulation materials for dampness. Wet insulation can promote mold growth and should be removed if damaged.
Wood Structures: Examine wooden beams or flooring for signs of rot or discoloration, which may indicate mold presence.
Ensure Proper Disposal
Once you’ve pinpointed the materials affected by water damage, the next step is to ensure proper disposal of any items that can’t be salvaged. This process is crucial not just for your health but for the environment as well.
Start by identifying which materials—like drywall, insulation, or carpet—are beyond repair. Many of these items can harbor mold, so it’s essential to act quickly.
When disposing of these materials, check local regulations regarding hazardous waste. Certain items, such as treated wood or appliances, may require special handling. Make sure you’re adhering to these guidelines to avoid legal issues and protect your community.
If possible, consider recycling materials that are still in decent condition. Many recycling centers accept items like metal and certain plastics, reducing waste and contributing to sustainability efforts.
This helps the environment and fosters a sense of belonging to a community that values responsible practices.
Finally, document your disposal process for insurance claims or future reference. By ensuring proper disposal, you’re taking a significant step in your mold remediation journey and promoting a healthier living space for yourself and others.
Conduct Post-Remediation Testing
Regularly conducting post-remediation testing is crucial to ensure that the mold has been effectively removed and that the environment is safe for reoccupation.
After you’ve completed the mold remediation process, it’s essential to verify the results through thorough mold testing. This step confirms the success of the remediation and provides peace of mind for you and your loved ones.
Here’s a simple checklist to guide you through the post-remediation testing process:
Select a Qualified Professional: Choose an experienced mold inspector who understands the specific requirements of your property and the local regulations regarding mold testing.
Conduct Air and Surface Sampling: Utilize both air and surface sampling techniques to assess mold levels in various areas. This comprehensive approach ensures you capture any hidden mold spores that may still linger.
Compare Results to Baseline Levels: Analyze the remediation results against baseline levels established before the mold removal. This comparison will help you determine if the environment is safe for reoccupation.
Document Findings: Keep detailed records of the testing results, including any recommendations for further action. This documentation can be valuable for future reference or if you need to prove compliance with health standards.
Review
In the battle against mold, think of your home as a fortress. Identifying growth sources and controlling humidity creates barriers to prevent future invasions. Utilize eco-friendly cleaning solutions and replace damaged materials, ensuring your stronghold remains intact. Just as a vigilant knight guards against threats, educate those in your space about prevention. Remember, consistent post-remediation testing is your watchtower, keeping your environment safe and healthy. Stay proactive, and your home can thrive free from mold’s persistent grasp.